Friday, May 27, 2016

Building walls … is not that simple, FYI from Niiharu for somebody in election


Basically, Zone C which occupies the southern half of the Niiharu Citizen Forest is an area for ecology to thrive with the least human intervention. And so, inevitably, it is the most popular area. The zone is home for lots of birds including turquoise alcedo atthis and goshawks. A fine weekend morning, many photographers with bazooka-sized lenses enter the area, and jostle along for the best spot to get a killer shot. Those knowledgeable families with small kids intentionally enter Zone C to have a secluded and intimate weekend lunch, avoiding nosy eyes of tourists. Despite of wasp attacks, the area certainly provides us pure and quiet joy of being in a deep forest, which is a difficult thing to have in Metropolitan Tokyo area.


Meanwhile, the capacity of the Zone C to receive human visitors is the smallest within Niiharu. People can forget this fact with their excitement surrounded by the nature. Many visitors would create hard-pressed soil not only of the trekking roads, but also of the off-track forest floors where rich ecology can flourish if left undisturbed. It is problematic. Moreover, as the area is intentionally kept natural as much as possible, off-track activity can be dangerous for naïve urbanites ... these are the thinking of the City. One of the missions for Lovers of Niiharu is to maintain the safety of trekking routes within Niiharu. One May weekend of clear sky, the Lovers received a request from the City: please build a barrier along a road in Zone C to prevent visitors from entering into the off-track area.


Volunteers with mission
We must protect it.

The road the City told us to build a barrier was along a contour whose eastern edge is a cliff falling down to a stream 3m below. The dense rain forest tricks our eyes so that it is easy to miss the discontinuity of the ground. An uninitiated, especially toddlers, can innocently venture in the forest floor and free-fall to a stream. The western side of the road is coniferous tree forest whose floor is to be protected from stomping. As always, the modus operandi of Lovers volunteers is non-mechanical. “Barrier” is a cordon along the route with a nylon rope and pegs. Volunteers have a pile of 2m long + Ø10cm charred wooden pegs made of timbers from thinning. We carried them to the site by hand, situated each along the road, and started to work. 


“It’s already a muddy swamp.
We don’t think a barrier is needed here to stop visitors to enter.”
“Yeah.”
The rope
Provisionally distributing pegs

For a peg to be secured, first, we made a hole of about 70cm deep on the ground with an iron bar. Then, insert a charred peg whose tip was sharpened somewhat. Next, we 2-3 times secured, but not fastened, a rope above a thru hole which was drilled on the upper part a peg. Two people pulled the rope from the opposite directions to make the peg stand vertical, and with a huge wooden mallet a third person stroke the peg-head to drive it into the soil. Forth member of the volunteers watch from the front to make it sure the pulling is even to let the peg go down straight. I thought it was a clever way! Ideally, the mallet shall strike the peg’s head from exactly above so that the operation could keep the surface of the head horizontal. When a blow hit the target in a slanted way, the head became oblique, or the thru hole could be disfigured that could make the later tasks for fastening the rope difficult. Next time when you enter somewhere with wooden pegs and ropes to barricade an area, you can just check the head of pegs for the skill level of the people who did the operation. J


First, making a hole with an iron bar
Pull and strike
with a guidance
After the pegs are secured on the ground, we put the rope through the holes of the pegs, and fastened. … I observed so many times how my senior volunteers tied the thick nylon rope around a peg … and couldn’t understand. After putting through the rope into a hole, making two rings where at least one of them was in a twisted way, strapping them around the head of a peg, … and with some complicated maneuver, the rope was secured.   ???????? During the Forest Volunteering 101, our instructor, Mr. Jimbo, told us rope-work was important. Indeed …


First, put through the rope into a hole.
Making rings …
And from here, it is beyond the capacity of my brain …
Pulling for a final touch
Well-done!

The work we did on that day turned out to be not so difficult. We completed the task along 200m road in less than 3 hours, and returned home with a grin “easy, easy.” Then, next week, we heard from the City praising our job well-done, and sending another request to cordon around a little hill. The hill is a property of the City who thinned the large sawtooth oaks and zelkova serrata last winter there. It is at the mouth of Zone 3 with very steep slopes. Both sides of the hill have small stream, and the groundwater level in the hill could be high. Considering the heavy traffic of the road running on the foot of the hill, I guess the City fears possible accidents of land slide … BUT, this hill is very popular for kids. It is a home of lots of rhinoceros beetles and stag beetles. During summer recess every year, kids (and often parents) with insect nets and small cage clamber the slope for precious summer prize. All the volunteers muttered, “Er, well, yeah, the City does not want to have any trouble, do they? But ….” ”OK, OK, it’s just a rope. Those who have a will can easily enter the hill. If they are injured beyond the barrier, the City can say they risked themselves due to poor judgement and the mandarins are free of accusation.” “Ah-ha, so, we just play a part of the game, don’t we?” “Certainly …” The task was easier than the week before.

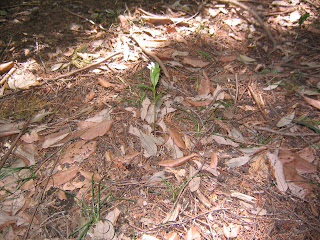
The hill of rhinoceros beetles is in this picture.
I won’t say which. It’s a top secret!

These days, it is rare for kids in Tokyo metropolitan area to encounter wild rhinoceros beetles. Many believe they can purchase the insect in shopping centers. They asked parents money to buy, keep and feed a beetle in a plastic box, write an observation diary for a couple of days as a summer recess homework, and see that store-bought creature die easily before long. No open air. No sunshine of summer. No rustle of leaves of trees. No thrill of hunt. No tears when the prize has gone forever. I’m just keep crossing my fingers there still are naughty kids who are brave enough for the adventure of crossing nylon ropes cordoning around the hill of hidden treasure …

Berries of lonicera gracilipes var. glabra, near Zoorasia.
They say they will be ripened in June,
but in mid-May this year in the north of Yokohama,
the berries are fully soft and sweet … Global warming?

If you find a problem in the Niiharu Forest, please make a contact with

Office for the Park Greeneries in the North 北部公園緑地事務所
Yokohama Municipal Government Creative Environment Policy Bureau 横浜市環境創造局
Phone: 045-311-2016 (I guess in Japanese only)
FAX: 045-316-8420 (I hope there is somebody who can read English …)

Niiharu Administrative Office / Satoyama Exchange Center 新治管理事務所・里山交流センター
Phone: 045-931-4947
Fax: 045-937-0898
http://www.niiharu.jp/


Friday, May 20, 2016

First Flash! Harvesting green tea leaves in Niiharu

Tea trees in Niiharu

Early May Sunday, Niiharu Lovers invited neighbors for the Annual Spring Fair. Traditionally, it is a festival for urbanites to experience Japanese tea-leave harvesting and log cultivation of shiitake mushrooms. Shiitake mushrooms will be harvested from logs on which the spores are inoculated, like this:

Those round marks on the sawtooth oak logs
are inoculation for shiitake mushrooms.
These logs are called hoda-gui
ほだ木.

Volunteers harvested about 10cm diameter logs in April, and sold a 30cm long log + mushroom spores for 200 yen (1.5 USD). We first made small holes vertically along a log, and let the visitors (mainly kids) to inoculate each hole with a 1cm peg-sized spore-pellet. A few taps by kindergarteners with a kid-sized mallet did a wonderful job. The visitors brought back the inoculated logs home, leave them under a shade, and water constantly in order not to let it dry. The vertically aligned spore-pellets eventually spread their lentinura edodes mycelium along the vessels in a log, and sprout mushrooms, 1-1.5 years later. Hmmmm … it takes time for having nice meals.


From Niiharu, early spring


Another main event was tea-leave harvesting. Niiharu Forest has several tea-tree farms (all of which are off-limits for visitors to see). A day before the Fair, the volunteers went into one of them and harvested first flashes. Next day, the visitors were invited to a smaller farm and experienced tea-picking by themselves. Both leaves were hand-processed communally during the Fair by the visitors and the volunteers so as to make “tea leaves” as we can find in supermarkets. Er, just listing the how-to is easy. To make tea leaves ready for hot water, we
  1. Pick the leaves,
  2. Steam them, and
  3. “Hand-massage” them in a huge pan heated by gentle charcoal until the leaves become dry.

That’s it. Only 3 steps. The devil is in the detail. Oh, yeah. The reason why we did in such a complicated leaf-picking is, making fresh tea leaves into a supermarket version requires time and effort. Let me explain.


We are picking leaves!

First, picking. Japanese tea trees, Camellia sinensis (L.) Kuntzeare max 80cm high and said to live for 100 years. Every spring they have new leaves. We pick the sprout and the next 1-2 leaves for making green tea. The best tea shall be made from the first 3 leaves of a new branch, the most senior volunteer told us. i.e. Don’t include older leaves and leggy branches that add another procedure to “clean” the harvested leaves before steaming. Sounds easy, right? Wrong. A day before the Fair, the volunteers went in to a larger farm with the eyes of amateurs, and realized deciding which leaves to be picked was very difficult. A fragrant tea farm of brilliant green fooled us to believe quite a lot of leaves would make a good cup of tea. So we became greedy and cut first 5 or 6 leaves and threw them in a plastic bag. The senior volunteers inspected our job, and said “No, no! We have to clean them. Leave only the first 3, and pick the lower 1-2 leaves from the stem.” “Er … but, they said Emperor Hirohito loved green tea of tea stems … wouldn’t it be OK to keep them?” “What!? He’s a war criminal! My brothers died because he made them his soldiers! Whatever he drunk, the best tea is from the first few leaves!” OK, OK, and so we “cleaned” … it was a meditation to purge our greediness ...


… We think they are the first 3 leaves … aren’t they?
Amateur-harvested tea-leaves …
are to be “cleaned.”
Cut at the end of first 3 leaves, then pick the other 2.
The stem is to be discarded.

Next, before steaming, the leaves are to be dried overnight. The freshly picked leaves can be processed immediately as well, but they can only be “Ban-cha” whose color is more of brown, rather than pale emerald green for green tea. Ban-cha does not have much of a slightly bitter taste of good green tea, and hence easy for kids to drink. Tea-picking by kids on the Festival day is for educational purpose. So, that’s that. But if we want to enjoy the taste of the first flash of the year, the freshly picked leaves must be dried before steaming. The rationale resides at the top 3 leaves, i.e. the growth point of a branch. In order to grow, the tree concentrates all the nutritional elements, e.g. various vitamins, theasaponin, catechin, theanin, … dissolved in water at the growth point. To make a flavorsome green tea, we need to preserve these nutrients as much as possible. They will be gone if we wait too long before processing the picked leaves. In addition, too much heat during steaming will destroy the elements. So our mission is to make the fresh tea leaves adequately dried before quick steaming. Ideally, picked leaves are to be collected in bamboo baskets at the field to start drying immediately. Lovers do not have enough number of baskets so that we gathered the harvest in large plastic bags, hastily spread the picked leaves over tightly-weaved stray mats, misted them with H2O, and left them overnight under a shed. Why spraying before drying? The sprayed mist causes the fluctuation of osmotic pressure in the cells of the first flashes that pushes within-cell moisture efficiently out overnight. Consequently, a swift steaming becomes effective.  By the way, Ban-cha are normally made of 2nd-3rd harvesting of tea leaves of a year and used massively for bottled tea-products. (At the end of day, we mixed the “Ban-cha” of visitors with the volunteer picked leaves when we shared the fruit of our labor J.)


Misting the leaves before drying
When winds are strong,
we cover the leaves with a straw-mat.

Third, we have to prepare the optimal tools for “massaging leaves” at least a day before. The overnight-dried and then steamed leaves are to be rubbed (a kind of, more below) over a huge rectangular pan, called hoi-ro 焙炉, set on charcoal heat. To keep the nutrients, the temperature on the pan should not be sizzling hot or dead cold, i.e. at about 40-50°C. We used pans made of wooden frame with a thin galvanized iron sheet at the bottom. Before using them, inside of the pans must be covered by a sheet of thick Japanese paper, wa-shi 和紙, that could maintain the heat just-right during the massages. The volunteer seniors mixed wheat flour and water in a small milk pan and cooked them in a low heat until the mixture became goo. Then, they spread it inside of the hoi-ro to glue the Japanese paper. Ideally, a sheet of paper is to be pasted snuggly, but not too tight, to cover the bottom and 4 sides of hoi-ro with the corners neatly tucked in, without any wrinkle. It is left overnight under the shed to air-dry. Wa-shi is made of pure organic materials that could flexibly and perfectly fit itself within hoi-ro when dried. Easier said than done, case 2. First, a hoi-ro is large. Spreading a paper over about 2m*1m of hoi-ro, tucking the corners immaculately, and pasting flatly (but not too-tight) without making wrinkles certainly required the skill and teamwork. Besides, Japanese paper is not cheap. “Oh, no, don’t crush it there!” “Geeee … wrinkles. You know, wrinkles do not convey the heat uniformly, which causes problems during tea-rubbing …” “Let’s hold each corner, and drop the paper at once all together … 1, 2, 3 … Woooooops!!!!”


First, wa-shi is cut to the size of hoi-ro,
and well-creased at 4 corners.
Strict inspection of corners
… a bad example to paste wa-shi over hoi-ro
… wrinkles, wrinkles …
It’s the thought that counts …
Prepared hoi-ro is left under the shed overnight.
We prepared 3 of them.

Fourth, preparation of massages. In the morning of the Fair, the volunteers built a fire with logs. Half of them were to be charcoals under hoi-ro, and the rest was to boil water to steam tea-leaves. The right amount of overnight-dried leaves were put in a 70cm*70cm rectangular sei-ro 蒸籠 which is a steamer made of wooden frame with a bamboo mesh at the bottom. Sei-ro was then covered by a wooden lid, and put on the one-holed wood panel covering a huge iron pan filled with boiling water over the fire. “Wait 40 seconds. This is important!” “Open the lid and quickly stir the leaves to let the heating uniform inside.”  “1 minute and 40 seconds later after setting the sei-ro over the boiling water, the steaming is complete. Exactly 1 minute and 40 seconds, you know.” The steamed leaves must be moved to a heated hoi-ro without delay. We did this back and forth between the steaming stove and 3 hoi-ros … for so many times. I did not count … The scent around sei-ro was superb. Continuously steaming tea leaves was a kind of aroma therapy, honestly. I loved it!


Building fire
The stove to steam tea-leaves
The charcoals were then fed with logs constantly.
Under the one-holed wood there is a barrel-sized iron pan
that keeps boiling water.
The steam comes out the hole,
and the wood panel also retains moisture during the process.
The amount of steam is just right.
It is a traditional tool well-designed.
Set the steamer over the wooden panel.
Of course, we Japanese use a digital timer,
whatever the tradition.
Stirring.
The amount of leaves is just right in a sei-ro.
No more, no less.
Wait, in total of 1 minute and 40 seconds.
The steamed leaves are hastily transferred to hoi-ro.

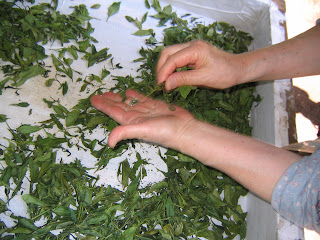
And fifth, massaging. The professionals massage tea leaves into delicate green needles like this. … it is too high mountain to climb for us. Besides, the Spring Fair is to let the kids experience the process of making dried tea leaves, so, let’s lower our bar … “No! The succession of tradition becomes possible only when we aim for the top. Thus, today, first, we have to knead freshly steamed leaves. Hold one leaf, or a sprout between your two hands and slowly scrub it … yes, a bit of force is recommended … well-done kids! “ (30 minutes later) “Now, the leaves become resistant to the kneading, so we rub them by handful … no, no, not too tightly. Your way of rubbing made the tea leaves into powder. That’s not right. Relax … Yes. That’s right.” (1-2 hours later) “OK, the leaves become loosely dried … let me see (stirring the pile of rubbed tea leaves) … but not enough for storage. If you keep them with this moisture, refrigerator or not, they will be molded. They must be dried further. Scoop the tea leaves with two hands and gently massage them by turning over the bottom to the top … yes, well done.” “We make small rows of semi-dried leaves … In this way, the leaves are exposed more to the external air circulation that could quicken the drying process.” “Don’t stir too much! Now leaves are much more dried, and thoughtless mixing make the leaves crumble!” “Hmmmm … the charcoal beneath here is almost extinguished maybe. Hey, please bring more charcoal here!” “Woops, this creased part of wa-shi is smoking! (er, as expected) we must move the leaves from here!!!”


At the beginning, take the steamed sprout like this, and
Nead it!
Like this.
Kids can do it!
Could you see the difference?
Now we are entering the rubbing phase.
Beginning of massaging
Creating ridges of tea leaves

And so on. Roughly 30 kids and 60 adult visitors collaborated with the volunteers to massage tea leaves over heated hoi-ro. We finally arrived green tea leaves dry enough similar to supermarket variety after about 4 hours of toil. Well, they certainly did not look like commercial product. But majority of teas in shops are quickly machine-processed. Ours was really hand-processed organic tea. They smell great. At the end of the day, about 120 people brought home the massaged leaves for numerous cups of green tea. Hurrrah!


The left plate is from leaves picked by kids
and processed without drying.
The right is from quasi-dried leaves.
They do not look much different,
but the tea on the right smells apparently stronger.
It must be due to the power of osmosis …
I also made black tea from left-over dried leaves of Niiharu.
The method showed here is definitely easier
than for traditional green tea leaves.
Looks like Fortmason Tea, wow.

Do you know the best way to enjoy green tea is brewing with good quality soft ICED water? We can just throw standard amount of green tea leaves in a pot of cold water with ice, and leave it for 5 minutes. Green tea brewed in this way does not release tannin and caffeine both of which are the source of slightly bitter taste of tea. Even babies of less than 1 year old can enjoy iced-water brewed tea. J


If you find a problem in the Niiharu Forest, please make a contact with

Office for the Park Greeneries in the North 北部公園緑地事務所
Yokohama Municipal Government Creative Environment Policy Bureau 横浜市環境創造局
Phone: 045-311-2016 (I guess in Japanese only)
FAX: 045-316-8420 (I hope there is somebody who can read English …)

Niiharu Administrative Office / Satoyama Exchange Center 新治管理事務所・里山交流センター
Phone: 045-931-4947
Fax: 045-937-0898
http://www.niiharu.jp/